
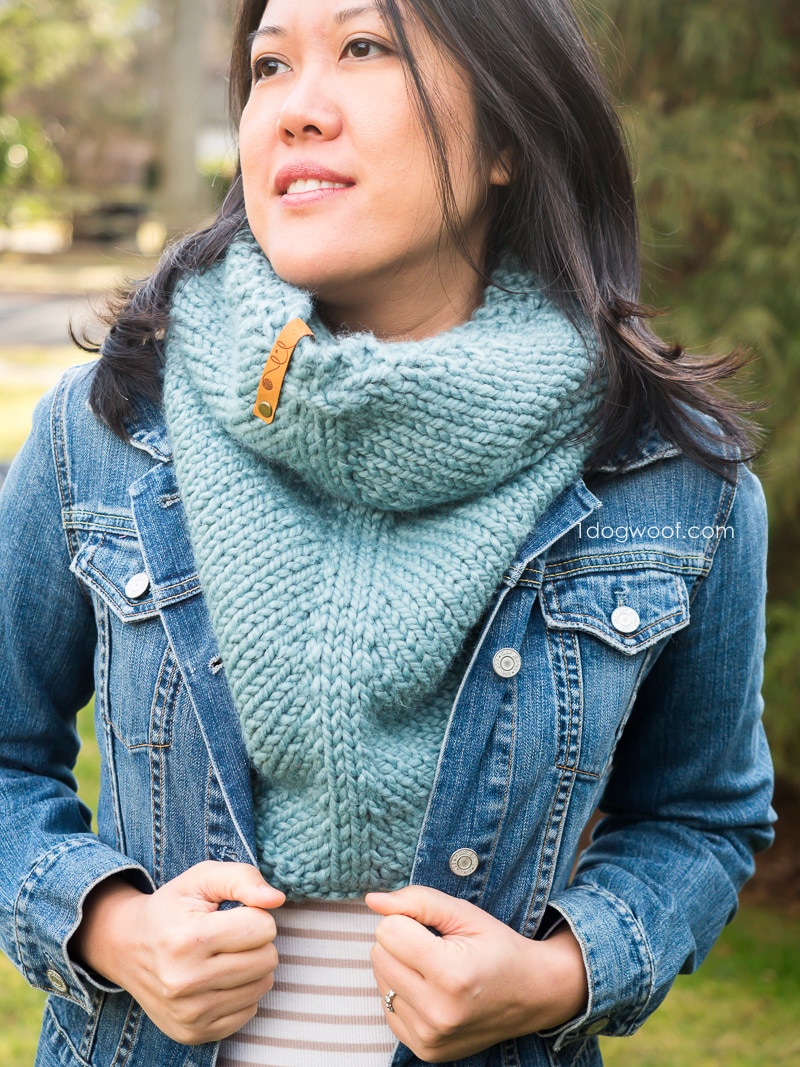
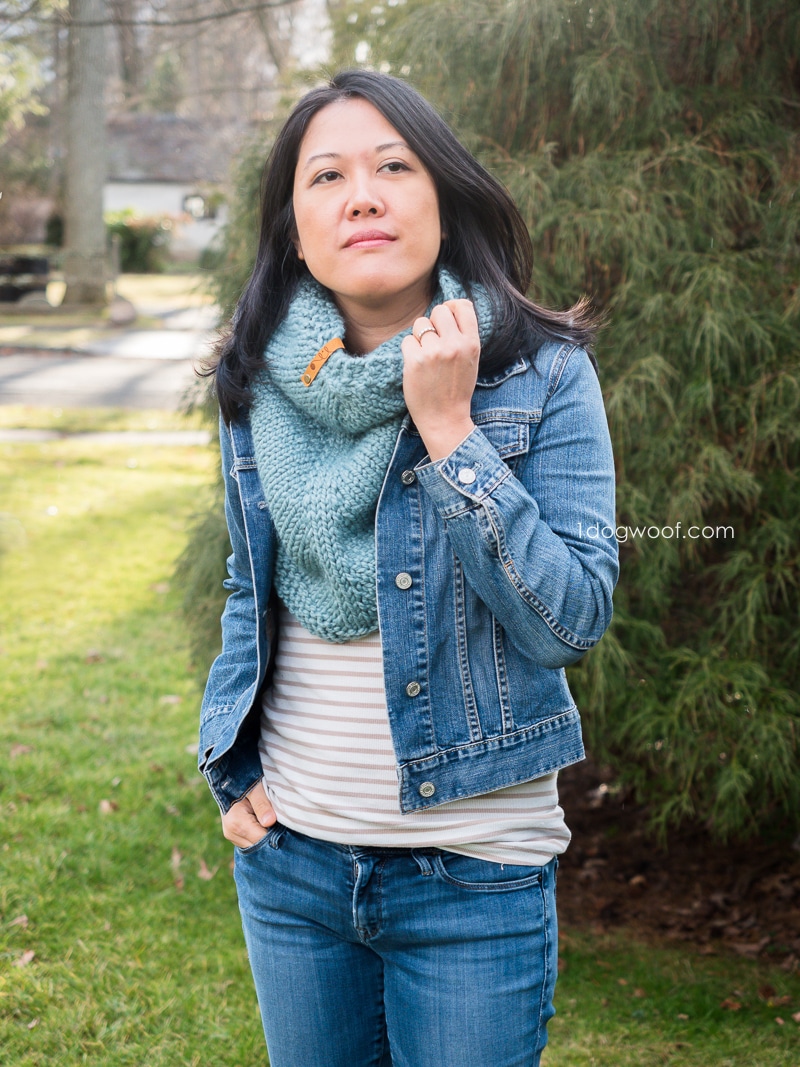
The Cactus Cowl knitting pattern walks you through making a bandana cowl, a triangle shawl without the triangle shawl ends. This makes it a warm and chunky winter neckerchief without all the extra bulkiness of those dangling ends and tassels!
Don’t get me wrong, I love triangle shawls. Even in my office, I drape my Cider Shawl over my shoulders all the time when the heat hasn’t quite kicked on. I especially love chunky triangle shawls that wrap you up in cozy vibes and woolly safety.
But chunky shawls are a bit cumbersome when you’re trying to wear it with an already bulky winter coat. Granted, it’s great for super cold days, when you want your scarf to wrap everything except your eyes. But for most days, all I want is a simple cowl to throw over my head that still has a bit of layering to tuck into the front of my coat to block those pesky cold drafts.
——————————————
You Might Like:
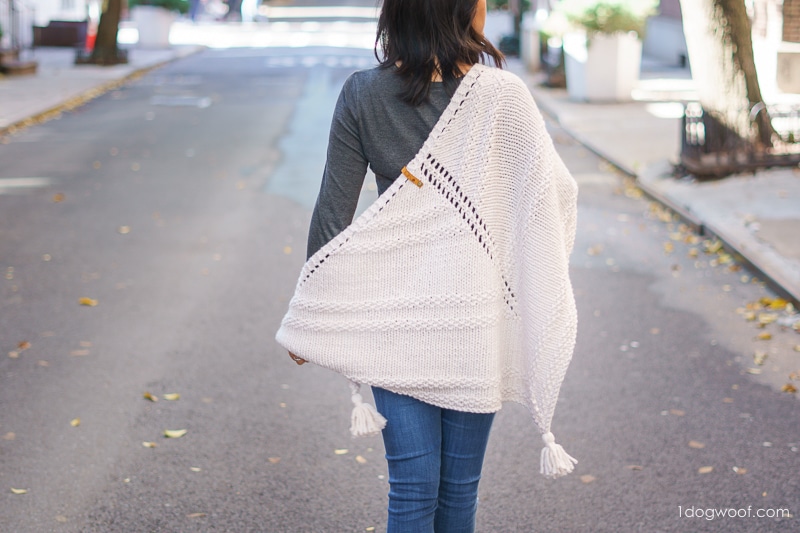
Berkshire Wrap, a different kind of triangle shawl
——————————————
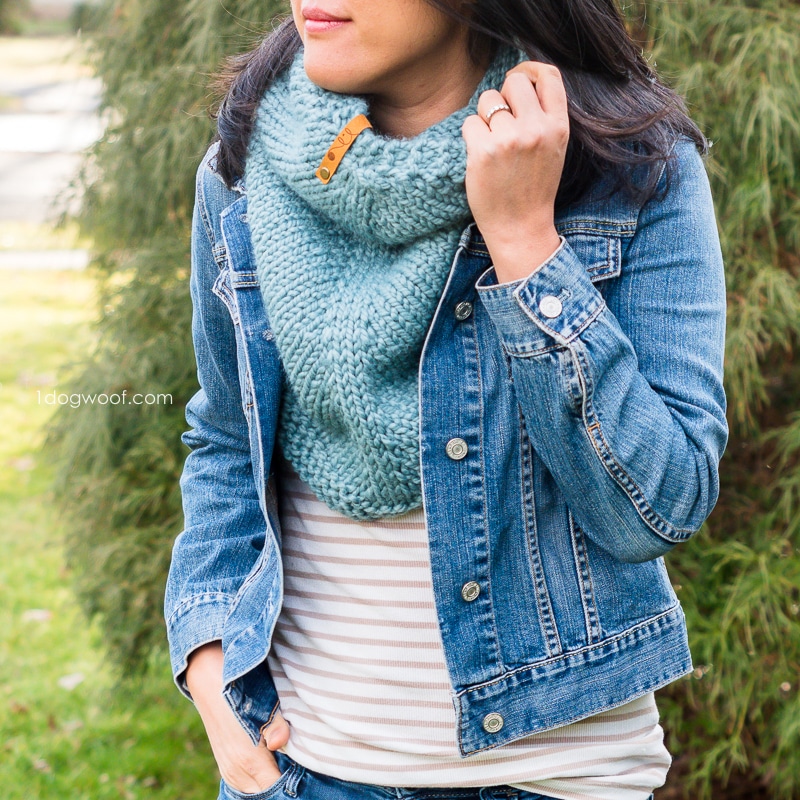
The Cactus Cowl is a bandana cowl or a neckerchief. There’s a triangle in the front just like the front of a triangle shawl, but it’s missing the triangle ends. Instead, it closes up at the back of your neck. That makes it less bulky right where you often have a fur-lined hood at the back of your coat. And as much as I love a good tassel, I don’t miss it in this case. I’m all for a simple, utilitarian yet beautiful piece of hand knit that I can throw on and wear every day, usually while I’m rushing out the door to drop off or pick up kids.
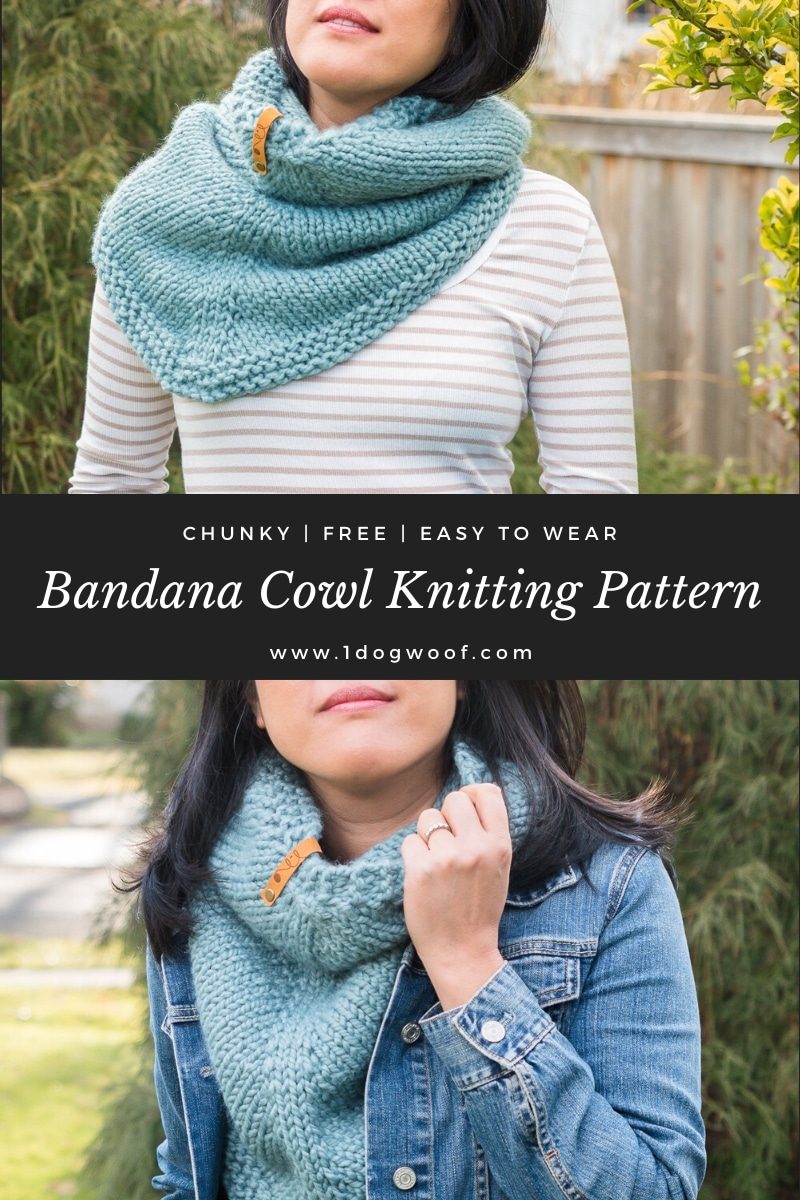
Click here to Pin it for later!
You can attack this simple pentagonal bandana cowl shape in any number of ways. (I’m hoping to explore that a lot more in my future designs!) For now, I just modifying a basic triangle shawl design and simply cutting off the ends, figuratively speaking. Let me show you what I mean.
Cowl Construction
In a typical triangle shawl, you start from the center top of the shawl, and increase on both the edges and middle of the shawl to create the triangular shape. So the beginning of the Cactus Cowl is just that, a baby triangle shawl. But once you reach the desired circumference of your cowl, you’ll want to stop extending the two outer points of the triangle, while still keeping the triangle’s middle point.
Instead of increasing on the edges of your “triangle shawl”, you’ll work a decrease stitch. This turns your work at a clean 90 degree angle. After a few rows of decreasing at the edges, you’ll see a straight edge forming, almost as if you cut off the ends of your triangle shawl. This straight edge is the “cowl” part of the bandana cowl, while the triangle from the beginning of the project is the “bandana” part.
You can continue the cowl part of the pattern until you reach a desired cowl height, depending on how much drape and squishiness you want in your cowl. Once you’re about to hit your desired height, work a few rows of garter stitch to prevent any curling, and bind off your work. Then seam the two straight edges together to close up the cowl. That’s it!
Admittedly, I was fairly excited when I worked this out, even though I’m sure it’s been done a million times before. I always find it fun to work with different types of shaping, which makes it no surprise I like designing crochet whales and other stuffed animals. Shaping in crochet is something I’m familiar with, but shaping in knitting is still new to me, so this was a fun challenge to work out!
Recommended Yarn
For this quick and easy project, you can use any bulky, category 6 yarn, like Lion Brand’s Wool Ease Thick and Quick. It’s already one of my favorite yarns to work with, but now they have it in this gorgeous Succulent color, their Color of the Year for 2020. Also, hello? A yarn named Succulent puts it right smack in my wheelhouse. If you follow me on Instagram, you’ll know I’m a fan(atic) about succulents – I buy them, I baby them, I love them. So when my fave yarn company comes out with one of my fave yarns in a beautiful color with a fave name, you know I’m grabbing some.
I don’t normally wear anything in the green family, but the Succulent colorway is green-ish blue depending on the light, and is such a sophisticated color. It brightens up drab winter coats without being overly bright. Of course, the Cactus Cowl knitting pattern is not color specific, so knit it up in any color you choose! You can see the entire line of Wool Ease Thick and Quick HERE. Lion Brand also has wool-free Thick and Quick for those of you with wool allergies!
You can find the free cowl knitting pattern below, or grab a printable/downloadable PDF from my Ravelry shop. Lion Brand also has the Cactus Cowl as part of a knit kit, where you can get the yarn of your choice and a printed copy of the cowl knitting pattern sent to you.
——————————————
Buy the Cactus Cowl knitting pattern PDF on Ravelry
Grab the Cactus Cowl knit kit from Lion Brand
——————————————
Supplies
- 160-200yds (146-183m) of super bulky, weight 6 yarn
Shown in sample: 2 skeins of Lion Brand Wool Ease Thick and Quick (6oz/170g, 106yds/97m) or 1 skein of Lion Brand Wool Ease Thick and Quick Bonus Bundle (12oz/340g, 212yds/194m) - Size 15/10.00mm 40” circular knitting needles (Adjust as necessary to obtain correct gauge)
- (2) stitch markers
- Tapestry needle
- Scissors
Gauge
8.5 sts and 14 rows in 4 inches of stockinette after blocking
Finished Size (One size only)
28” (71.1cm) around x 25” (63.5cm) long at tip of triangle
Abbreviations
- st(s) – stitch(es)
- K – kni
- P – purl
- yo – yarn over
- pm – place marker
- sm – slip marker
- m1R – make 1 right: insert left needle from back to front under the bar between your stitches, and knit the new stitch through the front loop
- m1L – make 1 left: insert left needle from front to back under the bar between your stitches, and knit the new stitch through the back loop
- sl st wyb – slip stitch with yarn in back
- sl st wyf – slip stitch with yarn in front
- k2tog – knit 2 sts together
- ssk – slip 1 st knitwise, slip next st purlwise to right needle. Slip sts back to left needle, knit both sts through the back. (The traditional method of SSK is to slip both sts knitwise, then knit through the back loop. This KnittingHelp tutorial shows that an SSK Improved where the second st is slipped purlwise and may lay flatter in your work. You can use either method.)
Pattern and Construction Notes
The Cactus Cowl is at heart, a triangle shawl. The difference is that instead of working out to points on the triangle, the design cuts in early to create a straight side, which is then seamed together to make a bandana cowl.
The pattern below uses super bulky Lion Brand Wool Ease Thick and Quick, but you can visit yarnsub.com for different super bulky yarn options.
For a garter tab tutorial, visit https://youtu.be/le2uhPv9MNg on my YouTube channel. In this pattern, you’ll pick up 5 sts in the middle of the garter tab instead of the 3 as shown in the tutorial.
Stockinette and garter sections are to be knit back and forth in rows, turning at the end of each row.
Blocking, especially with natural fiber yarn, is highly recommended. If the gauge during construction is a bit tight, you should be able to block out to intended size. Acrylic yarns will not stretch as much with blocking so your gauge should be correct as you knit.

Instructions for the Cactus Cowl Knitting Pattern
Start with a garter tab cast-on:
Cast on 3 sts. Knit 7 rows. Turn your work 90 degrees clockwise, and pick up 5 sts evenly across, placing a marker after the 1st st and after the 4th st. Turn your work again 90 degrees clockwise, and pick up 3 more sts. You should have 11 sts on your needle.
Stockinette section:
Row 1 (RS): K3, yo, k until marker, m1R, sm, k3, sm, m1L, k until last 3 sts, yo, k3. (15)
Row 2 (WS): K3, p until marker, sm, p3, sm, p until last 3 sts, k3. (15)
Repeat Rows 1 and 2 until width measured along garter tab edge measures 28”/71.1cm.
Decrease section:
Row 1 (RS): Sl st wyb, ssk, k until marker, m1R, sm, k3, m1L, k until last 3 sts, k2tog, k1. (2 sts increased, 2 sts decreased)
Row 2 (WS): Sl st wyf, p until marker, sm, p3, sm, p until end of row. (no change in st count)
Repeat Rows 1 and 2 until slip stitch edge measures 13”/33cm.
Garter border:
Row 1 (RS): Sl st wyb, ssk, k until marker, m1R, sm, k3, m1L, k until last 3 sts, k2tog, k1. (2 sts increased, 2 sts decreased)
Row 2 (WS): Sl st wyb, k until marker, m1R, sm, k3, m1L, k until end row.
Repeat Row 1, Row 2, Row 1.
Bind off loosely on WS row.
Cut yarn, leaving a 2ft long tail for seaming.
Finishing:
Block the cowl flat, before seaming to specified measurements.
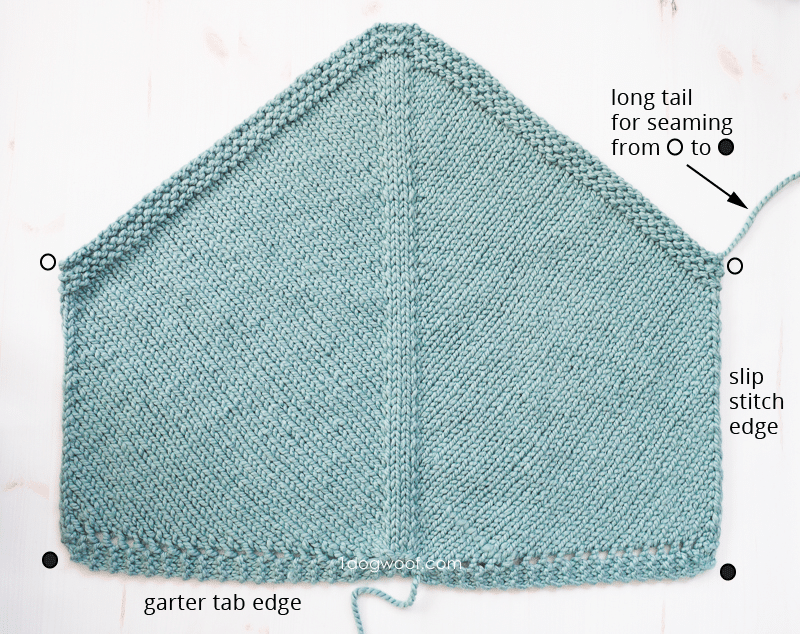
Once blocked, use yarn tail to seam the sl st edges together, working a mattress stitch through the horizontal bars or “ladder stitches” along the sl st edge. Keep the mattress stitch loose and not scrunch up the seam. See Figure 1 below.
Fasten off and weave in all ends.


This cowl is beautiful! I would love to see it in a crochet version because I can’t knit.
This cowl is beautiful!
I’m pretty new to knitting. I don’t have the circular needles, can I do this on regular needles?
It may be difficult to do on regular straight knitting needles because the stitch count keeps increasing for a number of rows to achieve the shape, meaning they might not fit onto your straight needles anymore. While you don’t need the circular needles to create the circle, the longer cord on circular needles gives you the room to have a larger number of stitches without having really long straight needles!
Ok, thanks. Bought the circular. I’ll give it a try! It’s so pretty.